Ripple Training’s TR Color Balance it is one of twelve plugins that comes with the Ripple Tools.
Before you can use this set of plug-ins, however, you will first need to download the FxFactory Application from the Noise Industries website. The current version at the time of writing this article is FxFactory 4.1.
Noise Industries is also one of our favorite plug-in developers. You’ll find a lot of cool stuff on their website. Another thing that makes these plug-ins a big bang for your buck is they can be used in not only Final Cut X, but Motion, Premiere Pro and After Effects.

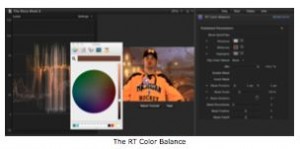
The main reason. the RT Color Balance effect is one of our favorites, is it is the closest thing we have to the original 3-way color corrector that was built into Final Cut Pro 7.
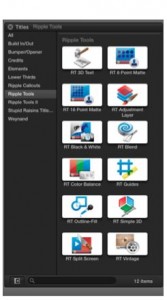
The RT Color Balance effect is located in the Titles Browser in Final Cut Pro X, in the Ripple Tools category. It can also be found in the Themes Browser.
To apply the RT Color Balance effect, drag it from the Titles Browser over the target clip or clips in your project.

To get the effect to exactly match the duration of a single clip, first make sure the playhead or skimmer is over the clip and press the X key to mark the clip range. Then, select the Color Balance thumbnail in the Titles Browser and press the Q key to connect it to the clip range.
Once in the project, you can reposition by dragging on the title, or dragging on either end to trim it. Then select it and open the Inspector (Cmd-4), and choose the Title Inspector.
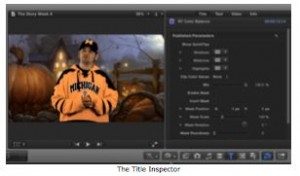
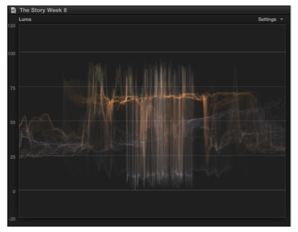
RT Color Balance lets you color correct a clip using the traditional color wheels. During the color correction process its always helpful to use the Video Scopes while correcting your clip (Cmd-7). Below in the screenshot, you see the Waveform displayed next to the clip.
Next, we’ll click the grey (meaning neutral) color swatch for the Shadow, then warm it up, and use the vertical slider to make sure we have some dark, rich blacks too.

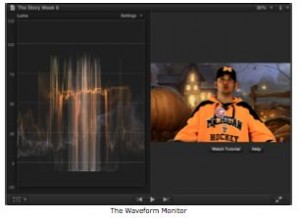
If we look at the waveforms below, you will notice that there is a scale from 0-120. Zero is Black and 100 is white. Over 100 is called Super White. You will notice that our waveforms are falling below the zero line. This means we have areas that have no detail in the blacks so we will want to bring them back to around Zero.
When making our adjustment with the vertical slider (Luminance) you will see that the waveforms will update in realtime.
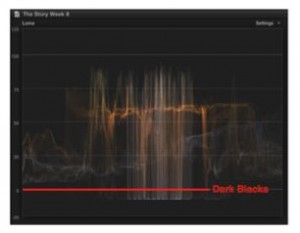
In the image below you will see the updated waveform.
Next, we’ll select the Mid-tones swatch and warm the shot by selecting the control point on the wheel. The further out on the wheel we drag the point the more saturation we are adding to the clip.
Keep referring to the waveform screen. Making changes to hue and saturation in the color wheel can have a big impact on luminance values.
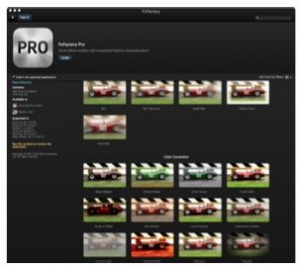
FxFactory Pro is a set of 160 Plug-ins consisting of Blurs, Color- Corrections, Distortions, Glows, Halftones, Sharpens, Stylized, and Tiling. There is a lot of cool stuff that we used while working on Animal Planet’s Treehouse Masters pilot.
But, we’d like to take you through a couple and show you how we tend to use them. In the Stylize category there is a plug-in called LED Lights. There has been many times where I’ve had to take a shot and composite it into another shot of a video board, like you would find in a stadium. This handy plug-in has saved us a few times now!
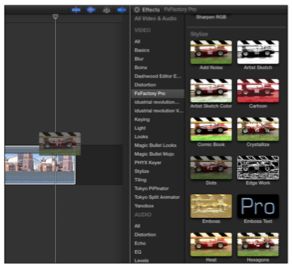
In the effects browser (Cmd-5) click on the FxFactory Pro. As you will see from the image below there are thumbnails to identify the effect to be applied to your clip.

Again place your skimmer or playhead over the desired clip and mark it by pressing the X key. Then, from the effects browser, double-click the thumbnail or drag the thumbnail onto the clip in the timeline. The clip will highlight with a white hue over it.
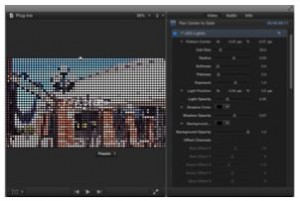
Once the effect is applied the controls are active in the Inspector (Cmd-4) under the Video tab.
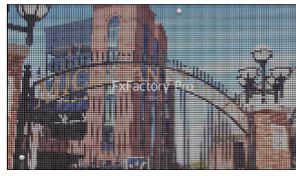
This particular plug-in has a lot of controls to tweak the look of the clip. In the Viewer there are two solid gray dots, the first at the very top of the viewer that controls the position of the light.
The control basically changes the highlight on each dot. It’s hard to see in the image but if you look on your own system its will be easier to distinguish.
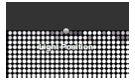
The second controls the pattern of the dots. In the images below you can see a before and after a pattern adjustment.

Now, lets continue to adjust the controls in the Inspector. The first one I want to adjust is the Cell Size.The dots are too big and making it hard to make …
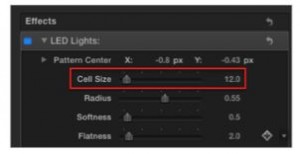
… out what the clip is actually of. Use the slider to find a size you like. We are going to set it to 12.
In the image below you will see our adjustment.
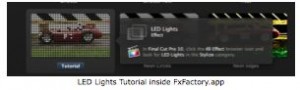
Since we have a few more to cover I’ll leave it to you to continue to explore the numerous controls in the LED Lights Plug-in. Depending on the look your going for, there will most likely be the controls inside the Inspector. You can also check out a video tutorial covering all the controls within the FxFactory Application.
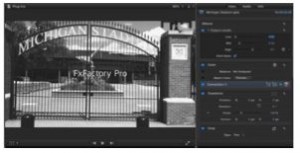
In the pilot episode we had several shots that we used for flashbacks. It was decided the director wanted to go with a kind of black and white effect. So, as we began to look for something better then to just desaturate the clip, we came across the Output Levels plug-in.
We started by desaturating the clip in the color board (Cmd-6)

In the Saturation tab of the Color Board you will find four controls. The slider on the far left controls the overall saturation of the entire clip. This is what we will use for this example. Dragging the slider upward will increase the saturation and yes dragging it downward will decrease it. So, I will drag it all the way down.
The three other controls control saturation in the Shadows, Mid- tones, and the Highlights.
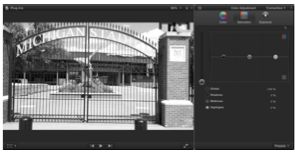
The next step is to apply the Output Levels. Back in the Inspector under the Video tab you well see the set of control sliders.

We have found that the Sliders in this plug-in has given me far better results then just the adjustments in the Color Board alone.
In the image above we have set the Low to 0.02, the Mid to 0.16, and the High to 0.7. This gives us the contrast that we were going for.
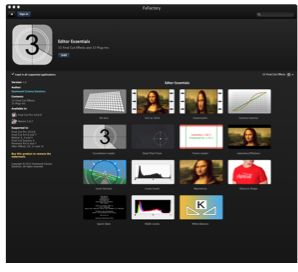
The next set of plug-ins are by a company called Dashwood Cinema Solutions. Their Editor Essentials plug-ins have some very useful tools we use almost daily.
The first we’d like to talk about is Quick Slate. As we edited each cut of each episode of Treehouse Masters, an Assistant Editor would have to export the cut for review and then post it to Discovery’s server. Part of the process, was that each exported H. 264 file had to have a slate at the beginning, so all of the brass could review and make notes for editorial. It was a hassle to have to open up a sequence with a prebuilt slate made from a text generator in FCP 7.
This one generator alone is worth the price for the team on our show. Click the Generators Browser button.
![]()
Click on the Dashwood Editor Essentials category.
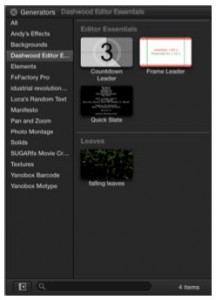
Drag the thumbnail to the head of the timeline. Generators can be identified by the Orange colored clip. As you can see in the following image.

In the Inspector we will start with the Program Type and change it from Commercial to Episodic Series as our project “The Story” is a weekly show.
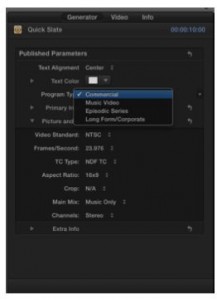
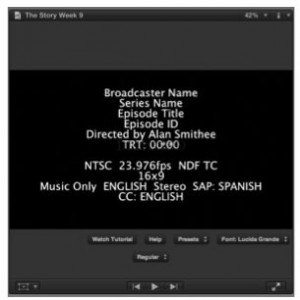
In the viewer you will see the updated Slate. Now, with Broadcaster name, Series Name, Episode Title and ID.
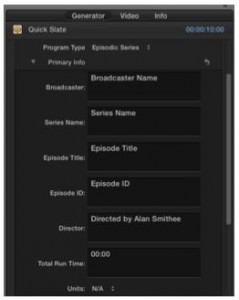
This make creating slates quick and easy, and save time and energy. To begin to edit the text click the discloser triangle next to Primary Info.
Quick and easy hints the name “Quick Slate”. I find the most simple of plug-ins are the ones that save you from the daily tedious tasks.
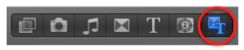
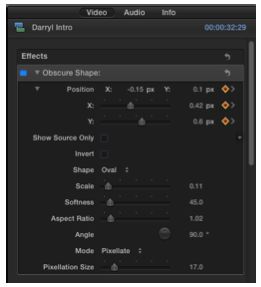
Another plug-in that I have found invaluable is the Obscure Shape. You can find it by clicking on the themes button.
It, too, is from the Editor Essentials Pack. Now most of you may have seen the News or the reality series Cops. This plug-in helps to hide the identity of a person on screen. Lets take a look. Like before, drag the thumbnail onto the clip you wish to effect.
The viewer updates with the on screen controls, in the Inspector we will start with the Shape control.
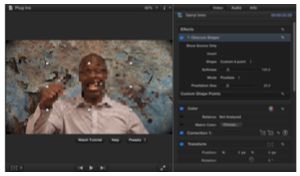
We want to change it to to Oval as the human head is more of an oval then a box.
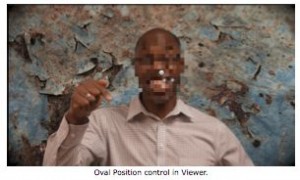
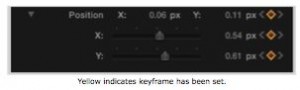
The issue here, is the person in the clip moves as most of us will unless, your filming the statue of David or something… So park the playhead at the head of your clip.
In the Inspector locate the position under the Obscure Shape, and click the diamond to the right. (This places a position keyframe at the first frame of the clip)
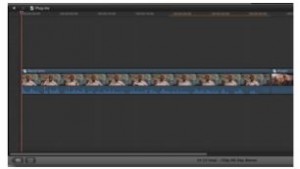
The next step it to step through the clip and reposition the oval over the face of the person or in this case the accused!
Once, you have the oval over the face in the frame, you need to set another keyframe in the Inspector or use the Keyboard shortcut of (option-K).
There is a lot of controls with the Obscure Shape plug-in. Such as the Mode you can change it from Pixelate to a couple of different blurs, as well as option for Scale, Softness and Aspect Ratio. So you’ll have lots to explore for yourself.
The final plug-in I don’t think you want to live without comes full circle from Ripple Training.
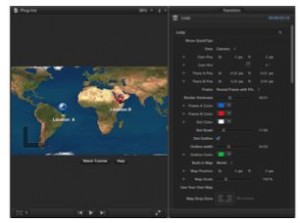
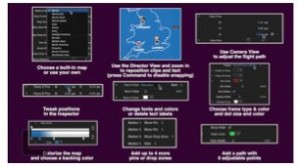
Jumps is a pair of Final Cut Pro X transition effects that allow you to graphically move your viewers through terrestrial space. Choose a 2D or 3D transition with built-in world maps or use one of your own. Add points of interest with user-adjustable pins or drop zones. Adjust the camera to create the exact map framing you like.
First lets apply the Leap transition to an edit point in out current timeline.
![]()
Use the skimmer to scrub through the transition, then park in in the middle of the transition. Make sure you highlight the transition in the timeline, and proceed to the Inspector to see the controls.
As you can see there are a lot of rich controls in this one plug-in. We won’t have a chance to tackle every one of them but again you can watch the tutorial within the FxFactory application.

We have given you a basic run down, so you can get started with it. To get help with the use of the Transition built into the controls in the Inspector, there is a check box.
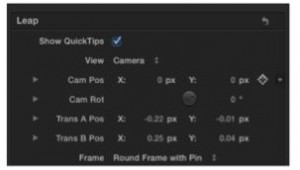
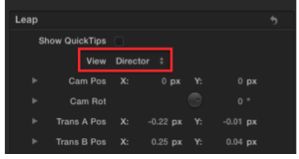
Show QuickTips will load a diagram into the viewer.
So lets give it a try… First if you have not already have done so uncheck the Show QuickTips check box.
Start with the View Control and set it to Director.
The Viewer updates to reflect a birds eye view of the map, and the updated controls to place you Drop Pin locaters.
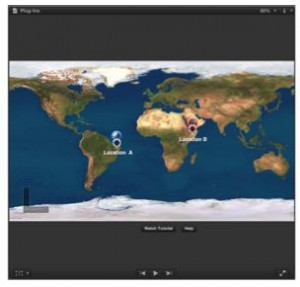
Use the Gray target like control to move location A. Then reposition Location B with the same process and set the view back to Camera. To play around the Playhead or Skimmer use the keyboard shortcut (Shift-/)
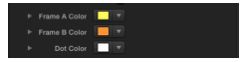
From there, you can go back and adjust the Frame A color. This changes the circle color around your outgoing video. Frame B Color, yep you guessed it, the incoming clips circle.
Real time feedback in the viewer.

We barley scratched the surface of how deep and rich the plug- ins we covered are. Spend some time going over the on-line tutorials that accompany most of the plug-ins. We hope you all have found this informative and helpful.
Please visit Rev Up Transmedia to read and learn more.


